Tuesday, April 19, 2011

At last! The Hazard Light Swtich is Installed

 Of course, I have no idea how to wire it in to the turn signal relay and BMW helpfully never showed how to do so in their wiring diagrams.  There must have been a service bulletin in 1967 when these switches were first used in the USA-only cars.  But my car has no loose wires with which to hook up that cute red switch. The button even has a tiny light bulb in it so it glows red in the dark, as if there's an automotive red-light district above the pedals.


1) The red hazard light switch (under the dash to the left of the odometer reset button)


2) Nowhere to connect

The only wiring diagram I have found is from a 1967 2000 Tilux.


3) The owners manual USA-version wiring diagram - '67 Tilux. It even shows the weird 9-prong turn signal relay (#47) which I had already installed in my car (see the relevant post on this blog).  The Tilux and the base model were supposed have been wired identically except for a couple of options on the former that the regular 2000 did not have

The diagram shows the switch (#25) as having 3 prongs, not the 6-prong version that I am told is the correct one.  Interestingly, there was a switch in my car - a non-automotive metal job - that had 3 prongs and was located where the hazard light switch rests. It reminds me of a button from an old stove and has been detrafficked to the garbage container in my garage.


4) The old set-up with the metal switch (visible at center-left between the wheel and the horn ring)

EDIT 10.2014:

The hazard lights work!  Turned out that the 3-prong version was the correct one after all. So 3 of the prongs on the new switch remain unused but the switch itself functions perfectly.


The Next Projects - On Hold Until We See the Sun

I like playing with my car as much as the next fellow, but there comes a time when automotive concerns must take a proverbial backseat to other pursuits. As we are completely fed up with freezing in the dark here in Seattle, we shall head off into the Pacific in a few days to bask in the warmth of Kauai.

So here is what I am leaving behind:

First, the back seat requires seat belt installation so I may safely ferry my son and his friends around Seattle on those rare sunny days when the rain lets up long enough to take the car out of the garage. With seat belts only available in the front seats, it's a bad idea to drive kids around unfastened.


1) The beltless back seat. Please ignore the tear in the seat's near side; my knee accomplished that particular upgrade while wiping off the rear shelf panel

I also have to get rid of the hideous black paint on the wheel rims.  I've ordered at set of chrome hubcap rings, or whatever you call them, to complement the effect once the wheels no longer look like Darth Vader drones.


2) Black Hole of the wheel rims

An interesting annoyance when changing the oil filter in the car is the obsolete oil filter housing.  You unbolt the contrivance and install an insert. Three gaskets and O-rings are required to complete the job.  One to go around the insert, one to cover the hole in its middle, and an additional gasket to seal the bottom of the housing where it is bolted.


3) The filter insert; one of the O-rings seals the hole in its middle


4) A view of the housing; the big gasket goes on top where the assembly screws into the top.  See the lovely op-artwork on the orange canister


5) The bolt on the bottom; another O-ring must be changed inside

I have several filters on hand - they are becoming harder to find - and have ordered a supply of gaskets and O-rings, which much come from Europe as they are NLA in the States. It has been suggested to me that I switch to the more modern oil filter housing that takes a canister filter, the one used on most 2002s, but it makes for a bad fit and the gurus recommend that I stick with the old system, at least until all the parts and pieces become terminally NLA.

Lastly, the lock on my trunk doesn't work. Not a big deal, but I'd hate to lose the original BMW jack and lug wrench that I have in the car, even though by all accounts they are poorly designed and rather unwieldy to use.  But I prefer keeping the original equipment.  And who knows, I may one day put something valuable in the trunk.

This operation will be tricky. The cylinder is hidden behind the bodywork.


6) The lock cylinder is in there somewhere

Once again finding good advice on bmw2002faq.com, I read that there is a ring just inside the trunk that attaches the cylinder and lock.  All you have to do, the writer explained, was to loosen it with a pair of needle-nose pliers and voila! the cylinder would slide out like a, well, I'm not going to mention the comparison.

Problem is, the thing is frozen tight on my car. There are two notches in the ring and apparently a tool exists that can overcome the freeze.  I have yet to find one and it's unclear whether or not the device will even fit in the cramped space, but I have ordered a new cylinder (with key) so we shall cross our fingers and eventually tackle the issue.

I should mention that I had a professional locksmith try to make a new key for the existing lock but he was unable to do so as the tumblers had themselves frozen inside the barrel.  A nice guy, he didn't charge me any money as he was unsuccessful in his bid to rectify the problem.


7) A sliver of the ring is just visible to the left of the lock mechanism

Anyway, we're off to the land of sun and fun, and these projects can quietly ferment in our absence.


8) The beach at Poli Hale, mon: photo by Diana Herring

Monday, April 18, 2011

Never Dull Never Dies

My rear view mirror was looked a bit peaked, specifically the chromed mount.  In the forums recently I had noticed differing opinions as to the qualities of "Never Dull."  One reader recently ventured that the stuff turns objects "silver" although I am not aware of any significant difference between silver and chrome, at least in look.

I am a firm believer in the product and used it this morning to shine my rear view mirror. The results were decent.


1) Freshly polished

Readers of this blog may recall what the thing looked like when I changed out one of the sun visor clips:


2) A "before" shot


Sunday, April 10, 2011

Accessory Book for the 1967 2000 (and other '67 NK models)

I found this on BMW2002faq.com. What a treasury!  I look, gasp, and drool.  Most of these toys are long NLA but just the idea that they once existed gives an owner pause and reason for hope.

 Grabbed from the computer screen, a list of accessories

See it all here (and thanks to TJones02):

http://s121.photobucket.com/albums/o236/tjones02_bucket/BMW%20Accessories%20Book%201967/

Friday, April 8, 2011

The Five Minute / Five Dollar Sun Visor Clip Fix

Frankly, I never would have thought you could fix anything on the car for five dollars, much less do it in five mintues.  But I did find one problem  solvable with an elegant and cheap solution.

I had a bad sun visor clip.  It was original to the car; the other one had already been replaced.

1) Busted and broken clip

The problem was worsened by the fact that every time I got into the car I couldn't help but notice the thing, staring at me as if to say, "Hi, buddy.  Don't let me rain on your parade but I'm bad."

Of course the clips for the 2000 are NLA but with a little bit of persuasion the 2002 version can be made to work. The easiest way to accomplish the fit is to replace the original screws with ones of smaller diamater and hold the clip parallel in place properly while you screw them in.  The smaller fasteners allow for greater leeway in positioning.

I ordered a clip online - $5 cost - and when it arrived a few days later I simply unscrewed the broken one, gave it a decent burial, and fastened in the new clip.

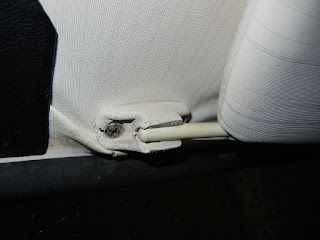
2) New clip now matches the other (at left)

While I was on the subject I changed all four clip fasteners from rusty zinc to stainless.

Now that the clips look good, the headliner looks bad. Maybe for another $5 I can fix that (while pigs fly over my house).

Tuesday, April 5, 2011

A New Look for the Shifter Knob

 Time was hiding under my dining room table with the cat this morning but I found enough to turn my attention to the unsatisfactory shifter knob.

1) The old look

Not that there was anything wrong with it.  I did buy the item on Ebay to replace the plastic knob the car came with, and the vendor had varnished it nicely to a high gloss. But that precise gloss didn't go with the rest of the woodwork in the car.  I started out with my usual 60 grit sandpaper and removed the surface varnish by hand, then switched to an round orbital sander to even out the wood and get the curves properly sanded.

Next I hand-sanded again with 220 grit paper, and finished smoothing the wood with fine steel wool. After applying two coats of teak oil the work was complete and now the shifter knob better matches the other colors and finishes in the car.


2) The new look; less polished but more authentic

More Mechanical Modifications

I had few more mods done after purchasing the car. They included the installation of a re-manufactured steering box.  The unit is constructed with a worm gear, an old but amazing bit of technology.  My first sailboat had worm gear steering and I've always been impressed with the direct feel that this type of steering gives to a navigator, whether on land or at sea:

 
An example of an early BMW steering box (photo from ebay)

I also got lucky and found a a set of NK Bilstein struts and shocks.  I had researched the items because driving the car on our rough Seattle back roads reminded me of bouncing on a trampoline.  Service reps. at Bilstein Central and also at various suppliers assured me that the Bilsteins made for 2002 would work fine; the kind people who post on BMW2002faq.com pointed out that this was impossible as the two models have very different body styles.  Eventually I was told that you could use the 2002 items with serious and expensive modifications required prior to installation.  I also found a set of NLA BMW struts and shocks, but they would have set me back nearly $1000.

Then Lady Luck graced me with her presence yet one more time.  Somebody from Whidbey Island, just north of Seattle, posted an ad for a used set of Bilsteins from an actual 2000 that he was parting out.  He sold them to me for $150, delivered them to my front door, and they did the trick.

The Bilstein part numbers are:

Struts # 4030803h000
Shocks # 02900400500

The company no longer lists them or even remembers that they once manufactured the things. 

Now I can drive on the interstate at 110 kms. per hour and if the road is straight and smooth I don't even have to keep my hands on the wheel the car is so tight.  Perfect opportunity to text and twitter my friends about what I'm having for supper and updates on the next Puget Sound rainfall.  Indeed well-chosen modifications make the world go 'round.

Of course if you really text and twitter while driving you might be in for a big surprise; the Earth is likely to stop spinning on its axis with a sudden thump.


Monday, April 4, 2011

Under the Hood - The Mechanical Menace


The engine compartment is a part of the car I would rather avoid, being as mechanically inclined as, say, your average couch potato.  However on occasion the dreaded region cannot be avoided.


1) A p/s overview of the engine compartment

One task I performed was to change the valve cover gasket.  They are notoriously weak in the 2-liter engines and tend not to last very long.  I have read that you can apply some sort of gasket compound when replacing the piece to strengthen the seal but I am not knowledgeable enough to do so with confidence.

2) From the d/s


I bought and placed the dust covers for the strut mounts. The trick was to guess whether or not the mounts were original or after-market.  Each, of course, takes a different sized cover.  With a 50-50 chance of being right I deduced correctly that the mounts were not original and so lucked out on the first try.

Another problem that was fixed as a condition of my purchase of the car was the brake booster. The old one was as hatched as a year-old egg.  So the seller replaced it with a re-manufactured unit.  He also replaced all the brake cylinders and shoes. Now my car screams to a stop whenever one of those ditsy Seattle drivers decides to text a friend while approaching a stop sign.


2) The new brake booster - one less thing to worry about for many many kilometers.

Above the booster is the inline fuel filter, which I changed not long after acquiring the car.  The old unit looked rather dirty, and with a $4 cost from NAPA Auto Parts the decision to install a new filter was a no-brainer.

However when I got the car the windshield washing system had been removed.  I did find the reservoir in a box in the trunk.  First thing was to acquire the bracket to fasten it to the body of the car.


3) The washer fluid reservoir, safely attached

The bottle also lacked a cap and I was lucky to find one of those cool ones with the hose ends on it.  La Jolla Independent even sent me some extra hose for free.

La Jolla also thoughtfully provided a pump, without which I would have been forced to enslave hamsters to turn a tiny wheel in the engine.


6) The pump is correctly installed here beside the washer relay, which originally dangled from the firewall when I bought the car.

I read on bmw2002faq.com that the 2002 nozzles would work in place of the NLA 2000 ones for squirting the juice.  And so they do.  They had to be bent carefully for proper aiming; the slots in the hood make positioning difficult.


4) The fluid nozzles, visible on each side of the plastic shelf

Also visible in the photo above is the Ireland Egineering Electronic Ignition I added.  No more points to worry about.

Now, if the gods are pleased, I'll only have to open the hood to check the oil every once in a while.  So far the car burns none.  Knock on sheet metal.


Friday, April 1, 2011

Fate is Sealed

The rear d/s door was missing the entire top of its door seal, the part that goes around the window frame. This unfortunate situation allowed water to get in the car when the Seattle rains hold their daily exhibitions - not that I drive much in the rain, ha ha - so I had to do something to seal the car.

I learned that the seals were still available in Germany and so, after another interminable wait, one was delivered to my door.  I peeled off the remainder of the old seal in about thirty seconds and cleaned the channel around the window frame with a screwdriver followed by a squirt of the ever-handy brake cleaner, which took care of the residue nicely.

As a next step I carefully forgot to take a photo of the door frame ready for its new seal.

In order to place the seal, which came as one piece, I first removed the pin on the door brake to properly mount the rubber into position. I had never before messed with door brakes and I couldn't help wondering if the door would fall off the car, despite the fact that it's securely attached to the body with a hinge. My paranoia proved to be unfounded.


1) Door pin removed and seal positioned

I had purchased, against my better judgement, a tube of the black cement that is used to adhere door seals. The stuff looked and felt worthless.  So to begin, I used a small hook to secure the seal to the channel in the window frame without this glue.  I am sure it will hold up fine.


2) The seal is now firmly secured to the window frame.  You may note that in stretching the seal around the door to test its fit, the thing snapped.  Old NOS rubber, I guess. The spots on the windows are water drops - I violated my cardinal rule this morning and drove in the rain

Now it was time to apply the black cement.  The directions indicated that I should apply a thin bead around the area to be glued and wait fifteen minutes.  Instructions from a sadist.

3) Second mistake, using that glue

The stuff got all over everything, stuck to my clothes, my hands, the floor, and various parts of the car.  If the cat had been there it would have stuck to him, too.

After the allotted waiting time I placed the seal on the door.  Of course it wouldn't stick in all the important places.  Getting fed up, I retrieved a can of super spray adhesive and used that to affix the seal properly.  But a couple of issues remained.  Since the seal had broke it no longer stretched completely around the door, leaving a gap.  And I had to frantically get out the old brake cleaner to wipe up the mess I had made.  The final result looked ok and will serve its purpose, though, even if there is one spot where there is still an empty space.


4) Finished at last. You can see the gap beside the door latch. The digital camera makes the final result look much messier than it really is.  I promise... Thank goodness BMW had the foresight to install another door seal on the 2000 as a backup, outboard to the new one

I probably should have taken the seal to a professional shop and had them do it, but that would have cost around $75 and I have learned from experience that most of those places don't know much more about putting seals on a forty year-old BMW than I do.